Yunnan Eats: Cheese, Cured Pork and Fresh Vegetables

On the road, we randomly stopped for lunch. The driver calls me into the kitchen, there we ordered, without a menu but rather from what they have in the kitchen, apparently fresh from the fields. He tries to explain the unfamiliar items while I struggle to decipher what he is telling me. But all is well that ends well.  We had a wonderful food experience throughout the trip.

Vegetables

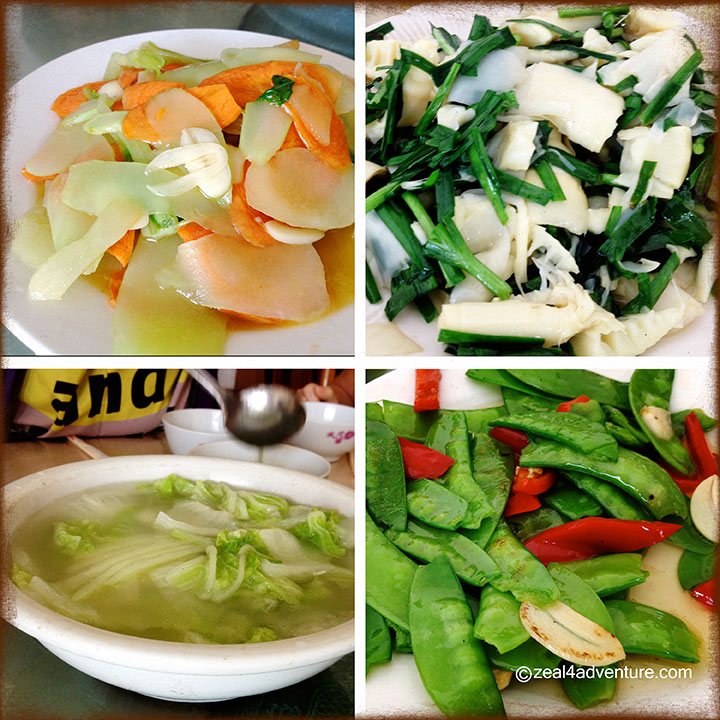
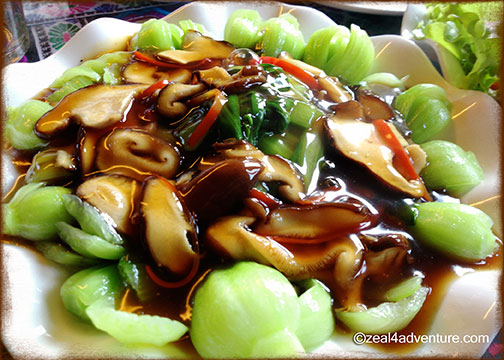
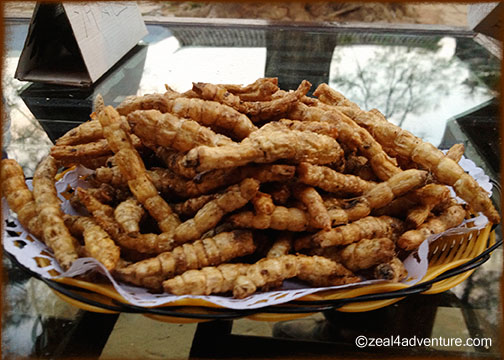
Fresh vegetables cooked lightly with lots of garlic and some chilies are a staple.   Because Yunnan has a diverse variety of plant species, you’ll find dishes made with ferns, bamboo shoots, flowers, tubers, fungi, herbs and even insects of all kinds.

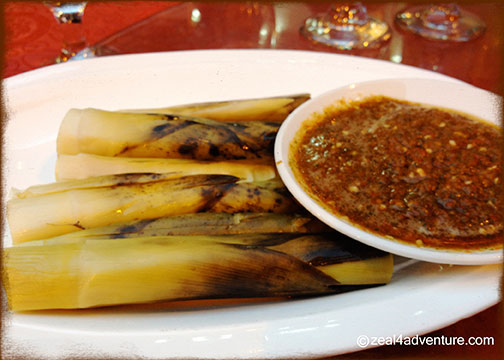
A kind of root that was actually quite good.
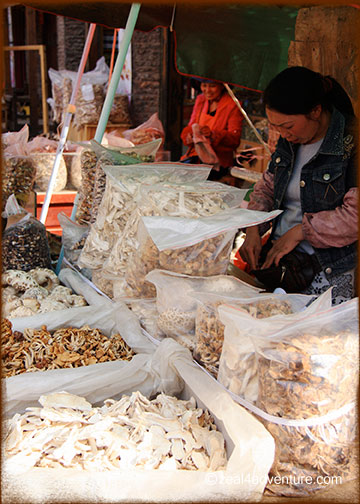
Various types of mushrooms found at the local market in Shuhe.
A typical local restaurant showcasing a variety of vegetables, tubers, flowers and ferns.

Cheese?

Cheese is something you do not expect in China because Chinese as a nation are not keen on dairy products. But in a province that lies on the fringe of China, its mash-up nationalities’ dietary habits are far removed from the mainstream Chinese. The love of dairy products could perhaps be attributed to the mélange of ethnic groups such as Mongolians and Tibetans. The way in which they eat it though is distinctly Chinese.

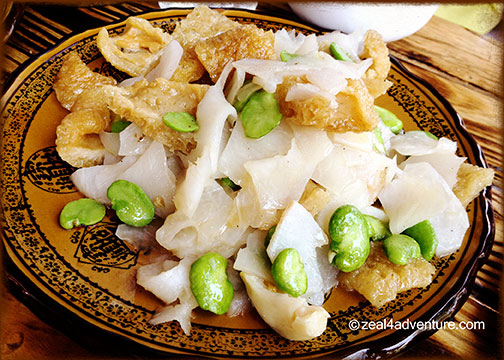
Called rubing, it is often served with rice, sliced and pan-fried until golden on both sides or cut into cubes and stir fried in a wok.

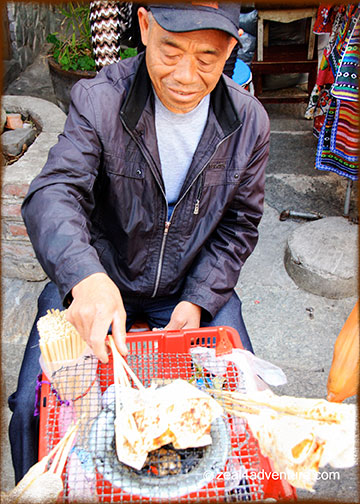
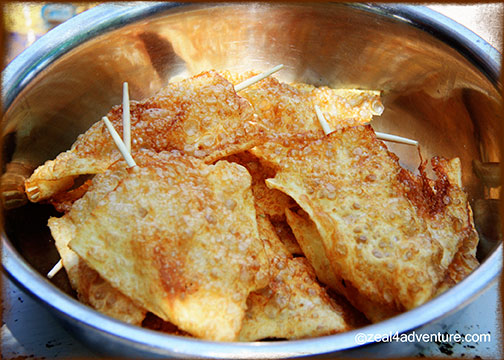
Another interesting cheese called rushan is grilled and sold by the roadside. It’s crispy and milky in flavor.

Cured Pork

Have you heard of Yunnan ham? We used to get them canned and is an absolute favorite of Anton’s. In Yunnan, we couldn’t find the canned one, but instead, we devoured it in so many other ways.

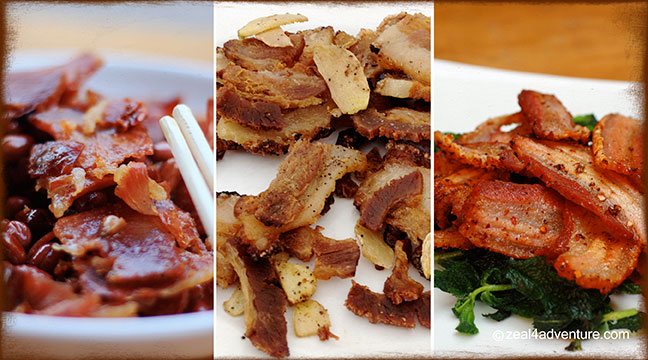
They love them steamed, boiled, fried… usually to flavor stews and braised dishes as well as soups and broths.

Xuan Wei ham from Xuan Wei City is the most famous. It is to China what Iberian ham is to the Spanish.

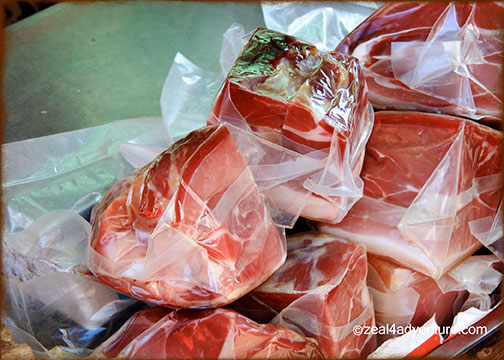
Found this in the local market in Shuhe.

And with this, I close my series on Yunnan. Don’t drool too much now. I hope you had as much fun reading it as I had re-living it.

Advertisement

Weekend Lasagna

Boring weekends are the best time to try a new recipe especially if the recipe calls for more preparation time and effort.  So one Saturday with nothing much happening, I planned then purchased all that I needed to try this Lasagna recipe, which I cut into half or God forbid, I’d never want to see a lasagna again.  I do enjoy it every so often but lasagna is not something I ever crave for.  So you’re probably wondering why I’d even bother.  I got a box of lasagna as a gift las Christmas so what else do I do with it?   😛  It’s a  good time too to use up the left over Marinara Sauce, which I believe came out well with this recipe. There may be quite a few ingredients needed but believe me, this recipe is worth your while.  Even if I didn’t follow the recipe to a tee and used

this interesting new find (substituted this with the crushed tomato the recipe originally called for), and even if I couldn’t find sweet Italian sausages and settled instead for garlic Italian sausages, this lasagna came out truly delish.  For someone who don’t really care much for lasagna, it means a lot to say that I will be making this again.  So here’s my version.

What you need:

  • 250g sweet or garlic Italian sausage
  • 250g ground beef
  • ½ cup sliced mushroom of your choice
  • ¼ cup chopped onions
  • 1 cloves of garlic chopped
  • 2 225g Clara Ole Chunky Tomatoes with Basil
  • 1 250g tomato sauce or this Marinara Sauce recipe
  • 1 (6 ounce) can of tomato paste
  • ¼ cup water
  • 1 tablespoon white sugar
  • 2 teaspoons fresh basil leaves chopped
  • 4 tablespoons fresh Italian parsley chopped
  • ½ teaspoon salt
  • ½ teaspoon Italian seasoning
  • ¼ teaspoon ground pepper
  • 320g ricotta cheese
  • ¼ teaspoon fresh grated or ground nutmeg
  • 1 egg
  • 500g shredded mozzarella cheese
  • ½ cup grated Parmesan cheese
  • 4-6 lasagna sheets

Here’s what you do:

  • Brown the ground beef, Italian sausage, mushrooms, onions and garlic in a pot until they start to cook. It takes about 6 to 9 minutes to brown the meat.

  • Gently stir in the tomato chunks, sauce, paste and water.

  • Add the sugar, chopped basil leaves, half of the Italian parsley, Italian seasoning, salt and pepper.
  • Cover the pot and let the meat sauce simmer. Simmer on low heat for 1 hour and 30 minutes.

  • Meanwhile, soak the lasagna sheets in hot tap water for 15 minutes.
  • While the noodles are soaking you can make the cheese filling.

  • In a mixing bowl, mix together the ricotta cheese, nutmeg, egg, and the rest of the Italian parsley.

Assembling the lasagna:

  • In a 5”-6” inch baking pan, spread 1 cup meat sauce on the bottom of the pan. Remove your lasagna sheets out of the water bath. Shake water off wet sheets.

  • Lay sheets across the layer of sauce. Spread half of the ricotta cheese mixture over the layer of sheets. Spread 1/2 of the mozzarella cheese over the ricotta layer.
  • Sprinkle half of the Parmesan cheese over the mozzarella layer.  Spread 1 cups meat sauce over the cheese layer.
  • Lay down the next layer of lasagna sheets.

  • Spread the remaining ricotta mixture over the sheets.
  • Spread the mozzarella and Parmesan cheeses saving some cheese for the top of the lasagna.
  • Put the last layer of meat sauce on the cheeses.
  • Sprinkle the remaining cheese on top.

  • It should look like the picture above. Cover with foil.
  • Bake in preheated oven at 350 F (177 C) for 25 minutes.  Remove foil and bake uncovered for another 25 minutes. Remove from oven and allow to cool for about 15 minutes.  Serves 4-6.

It may be more work than your normal stir-fry but hey, the weekend is free and if you double up the recipe, you have the week ahead to devour this one delish dish.

Awesome Marinara!

Credits: Jackie Torres URAwesome Quick Page

From my summer read last year, I came across many delightful recipes that I noted to try.  The book, Mediterranean Summer is an interesting read about David Shalleck’s life-changing culinary journey as chef on board the Serenity, the classic sailing yacht owned by one of Italy’s most prominent couples.  His challenge was to prepare all meals for them and their guests with no repeats, using only local ingredients that reflects the flavor of each port all from the confines of the yacht’s galley while at sea.

Shalleck provided recipes of the meals he prepared and I found many of them quite interesting.  I decided that my first recipe of his will be this simple Marinara recipe, which I can use a base for many meals.  It turned out really good.

The pepper flakes added a nice element of heat although the subtle tang of anchovies goes very well with fish and seafood, the sauce in fact works with everything – including sausages.

The recipe makes 4 cups, go ahead and make a whole batch, transfer them in bottles and just store them in the fridge.   It will keep for at least a month or so but trust me… it won’t last that long.

La Nostra Marinara

(adapted from the book The Mediterranean Summer by David Shalleck)

What You Need:

  • 1/4 cup pure olive oil
  • 1 medium yellow onion, peeled, cut into 6 wedges, and the layers separated
  • 3 large garlic cloves, peeled and light crushed
  • 1 tablespoon roughly chopped anchovy fillet
  • 2 tablespoons finely chopped Italian parsley
  • Two 28-ounce cans whole peeled tomatoes, pureed with their liquid
  • ½ teaspoon dried oregano
  • ½ teaspoon hot red pepper flakes
  • 1 ½ teaspoons fine sea salt
  • 1 teaspoon sugar

Here’s what you do:

  1. Heat the olive oil, onion, and garlic together in a nonreactive saucepan large enough to hold the tomato purée over medium-low heat.
  2. Cook, stirring from time to time, until the onion and garlic are soft but not browned, 8-10 minutes from when the onion starts to sizzle.
  3. Remove the onion and add the anchovy.  Using a wooden spoon, mash the anchovy with the garlic so that they combine into a paste.
  4. Add the parsley, stir, and continue to cook for 30 seconds, and then add the tomato purée, oregano, hot pepper, salt and sugar.
  5. Adjust the heat to keep the sauce at a low, steady boil and cook, stirring from time to time to keep the sauce from burning on the bottom, until the sauce starts to thicken, 30-40 minutes.
  6. Check the seasoning and add oregano, hot pepper or salt to taste if needed.  Makes about 4 cups.

Parmesan Oatmeal

Credits:  Snack Bag, Sunshine, Fun Surf papers from LivE SSunFun collection; Floral clusters and journal tag from LivE U R Awesome kit.  All from LivE Designs.  Ribbon Acrylic from Scrapmatters Life Little Surprises kit.

After a 3-month non-stop feasting on all sorts of food, my test results finally manifested negatively on this indulgence.  Cholesterol levels are a tad higher than normal so I run to old, reliable oatmeal to deliver me back to health.  Aside from its many benefits – one being a good source of soluble and insoluble fiber, which helps reduce LDL cholesterol, I just absolutely love it – especially this Scottish oatmeal.  It is a quintessential start to my day until recently, that is.  I’ve been lazy in the morning, preferring easy, instant fares such as granola with milk or yogurt, toasted breads with loads of butter and jam (tsk, tsk.), or just plain coffee (if I’m really, really lazy).

Plain oatmeal is bleh so I almost always cook it with milk (instead of just plain water), somedays I sweeten it with agave syrup and a fruit (like bananas or mangoes).  More often though it’s the savory kind that I crave for – topping it with spicy tuna from the can, grilled sausages or even pork floss.  And recently I discovered that cheese goes very well with oatmeal too when I stumbled on Stephanie Izard’s recipe that suggested fusing olive oil, cheese, salt and pepper – but of course!  An instant favorite!!   😉  So here’s my version.

Here’s what you need

  • Oatmeal, preferably steel-cut
  • Milk
  • Parmesan cheese (you can also try gouda, edam or manchego)
  • Extra-virgin Olive Oil
  • Sea salt (I used flaked salt)
  • Freshly cracked pepper

Here’s what you do

Cook the oatmeal (as directed on the pack) with milk (or water if you prefer).  Drizzle some good EVOO, add a fair amount of shaved or cracked cheese and season with sea salt and freshly cracked pepper (adjusting to your taste).

Satisfaction twice over – healthy and great tasting to boot… is this a winner or what?   😀

Useful Info:

*  Bob’s Organic Scottish Oatmeal is available at Healthy Options.

Kung Pao Pasta in a Snap

In the Sichuan Province where this dish supposedly originated, Kung Pao Chicken is usually eaten with rice.  I like it either way, mixed with pasta or over rice.  I first came across Kung Pao Chicken absurdly in the US, Panda Express most likely but many of the Chinese restaurants would have it on their menu.  In fact, even the place just across our apartment, where we always order take out, have it.  Since then, it has become one of my favorites and when I came back to the Philippines some 20 years ago, I found out that it was practically unknown then.  So I soon forgot about it until a few years ago when it finally caught on here.  Some establishments (CPK, I think and recently KFC) came out with their own version, introducing it as a pasta dish even – to my delight.

The sauce has soy sauce, vinegar, rice wine, sesame oil, garlic, chili and sugar, making the dish sweet, sour, salty and spicy.  While I love the dish, I never attempted making it at home until recently.  If you have all the ingredients (which could be a handful) it is a relatively undemanding dish (with a lot of flavor to boot) that’s made even easier with this.

Have it over rice or with pasta, up to you.  I am all for cooking from scratch but some days really calls for a meal in a snap.  This is a great pick for a stressful day – I just followed the recipe at the back of the pack.  Experimenting is for another day as I can imagine it absolutely wonderful with shrimps and rice.

Chicken Kung Pao

What you’ll need:

  • 225g Clara Ole Kung Pao-style Pasta Sauce
  • 250g pasta of your choice
  • 150g chicken breast, cubed
  • Peanuts, salted or unsalted, with or without garlic
  • Spring onions (optional)
  • Salt to taste

Here’s what to do:

  • Sauté chicken in oil.  Season with salt.
  • Add in peanuts and cook for a few minutes.
  • Pour in the Kung Pao sauce and cook until heated through.
  • Toss in pasta and the spring onions.

Yes, that simple and very flavorful too.

*Note:  I only made half of the recipe.

Sausages to the Rescue

I love sausages and always have a few stashed in my freezer.  These tasty bangers save the day for me many times over.  There are days when A is famished and I am worn out.  This scrumptious dish has become a winner because it does not ask for much attention or preparation for that matter and yet delivers such great flavors.  I’ve experimented quite a bit on this and one can use anything to team this up with but the combined flavors of kielbasa with apples is simply amazing.  Sweet and savory is my favorite thing of late and this dish incorporated with onions, garlic and some carrots simmered with a bit of broth… delightful.  And the gratifying part is all you need really is to slice up the veggies, pop in the oven and voila.  Happiness is…

A Simple Sausage Supper *adapted from Jules’ Stonesoup

  • 1 brown onion, peeled & cut into segments
  • 2 small apples, peeled and cut into segments
  • 2 small carrots
  • 1 small head garlic, unpeeled but broken into individual cloves
  • 2-3 thick pork sausages
  • 1/2 cup chicken stock

Here’s what you do:

  • Preheat the oven to 200C (400F). Place the apples and other veggies in a baking tray, drizzle with some olive oil, top with the sausages and pop it in the oven.
  • After about 30 minutes, give everything a stir and add the stock.
  • Bake for another 30 minutes or so until the veggies and bangers are brown and the stock has reduced and thickened a bit.

The recipe actually called for another hour in the oven but I wanted more stock left just because it goes so well with rice.   Go with 1 hour if you prefer the dish drier and the sausages browner.

Remember that very little is needed to make a happy life. -Marcus Aurelius

Clearing the Crisper

I think I buy way too much stuff.  It’s either that or I need to eat in more often.  I get over excited when I see produce that I like in the market.  You see, shopping for 2, sometimes just for me is not an easy task.  And more often than not, I tend to go overboard.  And so I always have fruits and veggies that are somewhat at the end of its prime.  Not good.  Because you don’t get the most benefit out of a wilting produce I don’t think.

So one day I saw a need to clean the crisper and get rid of all those droopy foodstuffs.  But I hate throwing hard earned money away so I decided to cook them at two goes.  They’re all left over stuff, a piece of this and a piece of that. And this was what I whipped up for dinner.

I call it Left-Over Omelet.  Pretty straightforward…  here’s what I found in my crisper:

  • 2 carrots,
  • 1 green bell pepper
  • a piece of white button mushroom
  • some shallots

Here’s what you do:

  • Dice all ingredients.
  • Whisk eggs and add milk for a fluffier omelet.
  • On a skillet coated with oil, spray or butter, add the veggies and cook for a while seasoning with salt and pepper and in my case, I also seasoned it with this*.
  • After a minute or so, add the egg mixture.
  • Use a spatula to push the eggs from the outer edge of the skillet toward the center.  Alternatively, you can also tilt the pan till the egg runs to open areas.
  • Do this till the egg turns white and edge a bit crispy.
  • Flip the omelet and cook for another minute or so.

The next morning, here’s what I did to these sorry pieces of sadness.

Peel, core and chop the apples.  In a saucepan, combine the apples with the following:

  • butter
  • brown sugar (I used coco sugar which is not so sweet)
  • cinnamon (I used cinnamon sticks)
  • vanilla bean (optional, I just had some so I used it)

Cook until mixture thickens and apple is tender.

I used this to top my Multigrain French Toast.  Yum.

* Note: Veg-Sal Spike Seasoning can be found at the seasoning section of Healthy Options.

A Taste of Greece

Greece has always been at the top of my bucket list.  The Mediterranean has always fascinated me.  I only had a couple of opportunities to wander through some of the countries bordering its seas – Italy and a teeny-weeny bit of Spain to be exact. One day I came across this post.  It not only revived my fascination for the Mediterranean — more specifically Greece, it had me craving for some Greek food too.  And since souvlaki is only the most popular Greek food, I thought of savoring a bit of Greece by re-creating Jen’s souvlaki recipe.  Although souvlakis are usually small pieces of meat grilled on a skewer, I pan-fried mine and did away with the skewer.  And instead of pita, I topped it on my basmati rice.  Equally as yum.

Yogurt Marinated Chicken Souvlaki

  • 3 tbsp fresh lemon juice
  • ½ tsp. dried oregano
  • 2 tsp. olive oil
  • ½ tsp. salt
  • 4 garlic cloves minced
  • ½ cup Greek or plain yogurt
  • 300g. boneless chicken breast cut into cubes

Here’s 2 ways to do this:

  • In a large glass bowl, mix together lemon juice, olive oil, oregano, yogurt and garlic; add chicken (or pork / lamb) and stir to coat. Cover, and refrigerate for 1 to 2 hours.

Option 1: the traditional way

  • Preheat grill for medium-high heat. Thread chicken onto skewers.
  • Lightly oil grate. Cook for 10 to 15 minutes, or to desired doneness, turning skewers frequently for even cooking.

Option 2:  If like me, you don’t own a grill

  • Lightly oil pan or a cast iron grill pan with a little bit of olive oil.
  • Cook the chicken for 10-15 minutes or to desired doneness.

Because the enzymes of the yogurt helped tenderize the meat, this chicken was moist, juicy and very flavorful to boot.

Parma Ham & Quinoa

A colleague came back from Parma, Italy and brought home for me a whole chunk of… Parma ham, what else?  Oh my!  How the hell do I slice this beauty nice and thinly?  So it sat on my ref for forever.  But hooray to Santis… they agreed to slice this whole slab for me (for a fee of course but who cares for as long as I get to partake of it and not just drool whenever I open the ref) and so this has become a usual fare lately.

Team it up with cheese and bread, eaten either as is or as a sandwich… heaven.  Love it and could never tire of it.  Vacuum packed, it goes a long way too.

The very nice staff of Santis asked me if I wanted the ends.  “It’s good for soups and stews”, they suggested, so I asked them to throw that in too.  And this is how I used it.

Not (yet) on a soup or stew dish.  I always have veggies that needed to be eaten yesterday.

So some cubed ends of the ham got thrown into a medley of stir-fried veggies (carrots and string beans) for flavor and some guilty pleasure to an otherwise healthy dish.  Instead of rice, I felt like having it with quinoa.  It’s a highly nutritional seed that is prepared and eaten like whole grain such as rice or barley.  I like it because I like the firm and slightly chewy texture.  I usually cook it with milk and sweetened with honey or Agave syrup. But I came across a savory recipe that piqued my curiosity.

Topped with fried egg… super yum!

Boil with chicken or pork stock then top with the stir-fried veggies (with the ham) and you’ll be hooked.  How to cook quinoa:  you can either follow the instructions on the label or watch this:

Useful Info:

Where to find Quinoa in the Philippines?  You can find it in any Healthy Options store in the metro.

My take on Kalbijim

A and I love Korean beef stew or Kalbijim as they call it in Korea.  For some reason – with all the delectable authentic Korean dishes we had during our 4 days stay – Kalbijim was surprisingly not part of the menu.  Don’t ask me why, it’s a mystery to me as it may be to you.  So in the spirit of my visit to Korea and missing out on the authentic taste of this wonderful tasting beef stew, I’ve decided one evening to look up a recipe and reminisce the taste of Korea just one more time.

Korean Beef Stew

  • 1 Kilo short ribs or beef flank
  • 4 slices ginger
  • 2 tsps. garlic, chopped
  • 1 pc. onion, sliced
  • ¼ tsp. chili powder
  • 2 tbsps. brown sugar
  • 6 tbsps. Kikkoman Soy Sauce
  • 3 cups beef stock
  • 1 pc. carrot, cubed
  • 2 pcs. raddish, cubed
  • 1 tbsp. Manjo Mirin
  • 1 tbsp. sesame oil
  • sesame seeds, toasted
  • leeks

Here’s what you do:

  • Boil beef in 3 cups water seasoned with salt and pepper for 30 minutes.  Set aside.
  • Saute ginger, garlic, onion, chili powder.  Add sugar and beef.  Make sure to cook until slightly brown.
  • Pour soy sauce and beef stock.  Cook until beef is tender.
  • Add carrots, raddish, mirin, sesame oil.  Garnish with toasted sesame seeds and leeks.

I had some mushrooms so I threw that in which explains the inclusion in the photo.  Totally optional, just wanted to use up the remaining mushrooms I had and add more veggies onto the dish.  If you want a truly authentic beef stew, omit the mushrooms.